
Deploy Next.js on a VPS in 2026: Docker & GitHub Actions
A first-person guide to deploying Node.js and Next.js apps on a $6/month VPS: SSH hardening, nginx, SSL, Docker, PM2, and a GitHub Actions deploy pipeline.

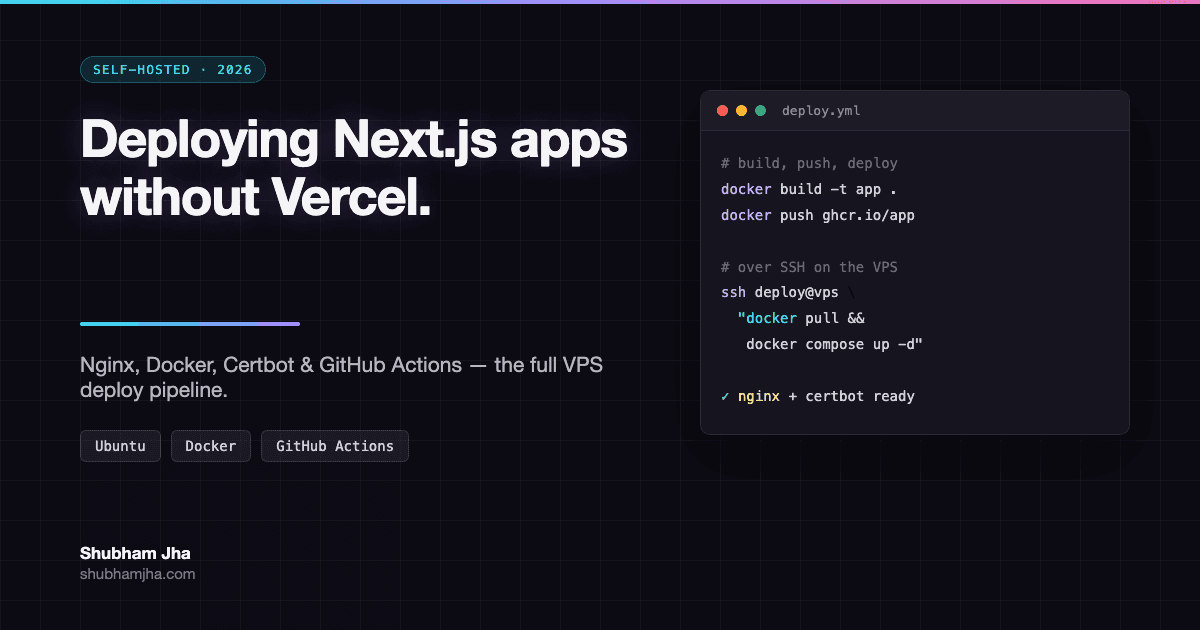
A $6/month VPS is now running four of my projects, for less than what one app used to cost me on a managed platform. That box didn't start out capable of that. The first time I deployed a Next.js app outside of Vercel, I didn't have a plan. I had a terminal, a fresh Ubuntu box, and a stubborn refusal to look up "how to deploy Next.js on a VPS" until I'd tried it myself first. That refusal cost me an afternoon. It also taught me more about how the web works than three years of git push and watching a dashboard turn green.
I didn't move off managed platforms because they broke, or got expensive, or hit some limit I couldn't work around. I moved because I was tired of not knowing what happened between git push and a user seeing my app in their browser. Vercel, Netlify, and Heroku are good at their job. That's exactly the problem: they're good enough that you never have to learn what they're doing for you. I wanted to know, so I decided I wasn't allowed to feel done until I understood every layer between DNS and my running process.
A managed platform doesn't remove the complexity of deploying software. It just moves it somewhere you can't see it. Renting a bare VPS puts it back in front of you, one layer at a time.
This post is everything I learned putting that back together, layer by layer, across projects ranging from a static portfolio page to a containerized Next.js app with an API and a database, all sharing that same single, cheap VPS.
TL;DR: Every project on a VPS shares the same foundation: DNS pointing at the server, SSH access locked down to keys only, nginx as the single front door, and Certbot handling SSL renewal automatically. From there, the setup gets more sophisticated as your app does. A static site needs nothing but an nginx block, a full Next.js app benefits from
output: 'standalone', a single Node process wants PM2 for crash recovery, and multiple services want Docker for isolation. GitHub Actions ties it together by building, pushing, and pulling new versions automatically over SSH. None of this requires more than 1GB of RAM if you configure a swap file and set memory limits deliberately.
Table of Contents
- How a Website Reaches a Server
- Provisioning the VPS and Pointing Your Domain at It
- Locking Down SSH Access
- Base Server Setup and the Swap File Safety Net
- Installing Nginx and Certbot
- Tier 1: Static HTML Sites
- Tier 2: HTML and JS Sites That Need Caching
- Tier 3: React and Next.js Static Export
- Tier 4: Next.js With Plain
next start - Tier 5: Next.js Standalone Output With an API Layer and a Database
- Tier 6: PM2 for Process Management
- Tier 7: Docker and Containerization
- CI/CD With GitHub Actions
- Running Many Projects on a Low-RAM VPS
1. How a Website Reaches a Server
Before touching a terminal, it's worth being precise about something most tutorials skip: what happens between a user typing yourdomain.com and a page loading.
A domain name is a lookup table entry, nothing more. When you buy a domain, you're not buying a website. You're buying the right to point a human-readable name at a machine-readable address. That mapping lives in DNS (the Domain Name System), and the specific record that matters here is called an A record: it says "this domain name resolves to this IPv4 address."
A VPS (Virtual Private Server) is that IP address. It's a slice of a physical machine, sitting in a data center, with its own IP, its own operating system, and root access that's entirely yours. When you provision one, the provider hands you an IP like 178.128.45.12, a string of numbers with no idea what domain, if any, points at it yet.
So the chain looks like this:
User types yourdomain.com
        ↓
Browser asks DNS: "what IP does yourdomain.com point to?"
        ↓
DNS returns the A record: 178.128.45.12
        ↓
Browser connects to 178.128.45.12 on port 443 (HTTPS)
        ↓
Your VPS (nginx) answers and serves the site
Nothing about this is Next.js-specific, or even framework-specific. It's true for a single index.html file just as much as a containerized microservice architecture. Every layer in this post sits underneath or on top of this one fact: your domain is a pointer, and your server is what it points to. Get that connection right first, and everything downstream, SSL certificates, nginx routing, deployment pipelines, has solid ground to stand on.
2. Provisioning the VPS and Pointing Your Domain at It
I used Hostinger for the box in this walkthrough, mostly because its VPS dashboard is unusually readable for a first-timer. Nothing here is Hostinger-specific, though. The exact same commands work identically on DigitalOcean, Linode, Hetzner, or an AWS Lightsail instance. What differs between providers is the dashboard you click through to get a fresh Ubuntu box. What doesn't differ is everything after that.
Creating the VPS:
- In the Hostinger VPS dashboard, choose a plan (a 1GB RAM / 1 vCPU instance is enough for everything in this post, including running several small projects side by side, covered in section 14).
- Pick Ubuntu 24.04 LTS as the OS image. LTS releases get five years of security patches, so don't pick a non-LTS version for anything you plan to keep running.
- Once provisioned, the dashboard shows you the server's public IPv4 address. Copy it. You'll need it in the next two steps.
Pointing your domain at the server:
Log into wherever your domain is registered (Hostinger, Namecheap, Cloudflare, the registrar doesn't matter, only the DNS record type does) and add an A record:
Type    Name    Value              TTL
A       @       178.128.45.12      3600
A       www     178.128.45.12      3600
@ means the root domain (yourdomain.com); www covers the www. subdomain. If you're planning to host multiple projects on this one server (covered in section 14), you'll add one more A record per subdomain later, blog, app, api, whatever you need, all pointing at the same IP. nginx decides which subdomain gets which project; DNS just needs to know they all live at this address.
DNS changes propagate over minutes to a few hours depending on your registrar and TTL. Before moving on, confirm it resolved:
dig +short yourdomain.com
# should print your VPS's IP address
If that prints nothing, wait and retry. Don't proceed to Certbot until this resolves, since Let's Encrypt verifies domain ownership by reaching your server at that domain.
3. Locking Down SSH Access
Your provider gives you root access over SSH with a password. That's the least secure state your server will ever be in, and the first thing to fix before installing anything else.
Step 1: Generate an SSH key pair on your local machine (not the server):
ssh-keygen -t ed25519 -C "your_email@example.com"
ed25519 is the modern, recommended key type: smaller and faster than the older rsa while being at least as secure. This creates two files: ~/.ssh/id_ed25519 (your private key, never share this) and ~/.ssh/id_ed25519.pub (your public key, safe to hand to any server you want to access).
Step 2: Copy your public key to the server. If the server's password login still works (it does, at this point), the easiest way is:
ssh-copy-id root@178.128.45.12
This appends your public key to ~/.ssh/authorized_keys on the server. If ssh-copy-id isn't available, do it manually:
cat ~/.ssh/id_ed25519.pub | ssh root@178.128.45.12 "mkdir -p ~/.ssh && cat >> ~/.ssh/authorized_keys"
Step 3: Test key-based login before touching anything else:
ssh root@178.128.45.12
You should log in without being prompted for a password. If you're still prompted, stop here and debug. Do not proceed to disabling password login until key-based login is confirmed working. This is the step people skip, and it's the step that locks you out of your own server.
Step 4: Only once key login is confirmed, disable root login and password authentication. Edit the SSH daemon config:
sudo nano /etc/ssh/sshd_config
Set (or uncomment) these three lines:
PermitRootLogin no
PasswordAuthentication no
PubkeyAuthentication yes
Restart SSH to apply the change:
sudo systemctl restart sshd
On some Ubuntu versions the service is named ssh rather than sshd. If the restart command fails, check which one is active with systemctl status ssh sshd and restart whichever exists.
Keep your current SSH session open while you test a fresh connection in a new terminal window. If the new connection works, you're safe to close the old one. If it doesn't, your still-open session is your escape hatch to fix the config. This is why you never restart SSH from the only session you have open.
From here on, the server only accepts connections from machines holding the matching private key, and only through a non-root user (create one with adduser deploy && usermod -aG sudo deploy if you haven't already, and SSH in as that user going forward).
4. Base Server Setup and the Swap File Safety Net
With access locked down, bring the system itself up to date:
sudo apt update && sudo apt upgrade -y
Install the handful of tools nearly every project setup in this post will need:
sudo apt install -y curl git ufw fail2ban
ufw (Uncomplicated Firewall) blocks everything by default, so enable it and explicitly allow what you need:
sudo ufw allow OpenSSH
sudo ufw allow 80/tcp
sudo ufw allow 443/tcp
sudo ufw enable
This opens SSH, HTTP, and HTTPS, nothing else. Any port your app runs on internally (3000, 5000, whatever) stays closed to the outside world. nginx is the only thing talking to those ports directly, and it does so over localhost, not the public internet.
Set up a swap file now, even if you don't think you need it yet. A 1GB RAM VPS runs out of memory faster than you'd expect. A single npm install or Next.js build can spike well past what physical RAM alone provides. Swap gives the kernel overflow space on disk so a memory spike causes slowdown instead of an OOM-killed process:
sudo fallocate -l 2G /swapfile
sudo chmod 600 /swapfile
sudo mkswap /swapfile
sudo swapon /swapfile
echo '/swapfile none swap sw 0 0' | sudo tee -a /etc/fstab
The last line makes it persist across reboots. Verify it's active:
free -h
#               total        used        free      shared  buff/cache   available
# Mem:           957Mi       210Mi       180Mi        1Mi       566Mi       650Mi
# Swap:          2.0Gi          0B       2.0Gi
This single file is what makes it realistic to run several small projects on a $6/month box without one bad build taking the whole server down. We'll come back to it directly in section 14 once there's more than one project competing for memory.
5. Installing Nginx and Certbot
Everything you deploy from here forward, static files, a Node process, a Docker container, sits behind nginx. It's the one piece of infrastructure you install exactly once per server, regardless of how many projects end up living on it.
sudo apt install -y nginx
sudo systemctl enable nginx
sudo systemctl start nginx
Visit http://yourdomain.com in a browser. You should see nginx's default welcome page, which confirms DNS, the firewall, and nginx itself are all correctly wired together before you add any application-specific configuration.
Certbot is what gets you free, auto-renewing SSL certificates from Let's Encrypt. Install it:
sudo apt install -y certbot python3-certbot-nginx
Every project gets its own nginx server block, a file in /etc/nginx/sites-available/ that says "requests for this domain go here." Here's the minimal version, before Certbot touches it:
# /etc/nginx/sites-available/yourdomain.com
server {
    listen 80;
    server_name yourdomain.com www.yourdomain.com;

    root /var/www/yourdomain.com;
    index index.html;

    location / {
        try_files $uri $uri/ =404;
    }
}
Enable it by symlinking into sites-enabled, then reload nginx:
sudo ln -s /etc/nginx/sites-available/yourdomain.com /etc/nginx/sites-enabled/
sudo nginx -t   # always test config before reloading
sudo systemctl reload nginx
Now issue the certificate:
sudo certbot --nginx -d yourdomain.com -d www.yourdomain.com
Certbot rewrites your server block automatically, adding the SSL certificate paths, listening on port 443, and setting up a redirect from HTTP to HTTPS. It also installs a systemd timer that checks twice daily whether any certificate is within 30 days of expiring and renews it silently. You can confirm the timer exists and dry-run a renewal:
sudo systemctl status certbot.timer
sudo certbot renew --dry-run
From this point forward, adding a new project mostly means adding a new server block and running Certbot once more for its domain. The baseline never changes.
6. Tier 1: Static HTML Sites
The simplest thing you can deploy is also the thing that needs the least explanation, which is exactly why it's the right place to start. A static site, hand-written HTML, a Jekyll or Hugo export, anything with no server-side logic, needs nothing but a folder of files and the nginx block from the previous section pointed at it.
Copy your built files to the server (from your local machine):
scp -r ./dist/* deploy@yourdomain.com:/var/www/yourdomain.com/
That's the entire deployment. No build step happens on the server, no process needs to stay running, nothing can crash at 2am because nothing is executing. nginx is just handing files to whoever asks for them. If your entire site is static HTML/CSS with no interactivity worth mentioning, you're done: everything past this section is solving problems your project doesn't have yet.
7. Tier 2: HTML and JS Sites That Need Caching
The moment a static site adds enough JavaScript or assets that repeat visits matter, a marketing site with a hashed bundle, a small interactive widget, the plain nginx block from Tier 1 starts leaving performance on the table. Browsers will re-download unchanged assets on every visit unless you tell nginx otherwise.
Add caching headers and gzip compression to the same server block:
server {
    listen 443 ssl;
    server_name yourdomain.com;

    root /var/www/yourdomain.com;
    index index.html;

    gzip on;
    gzip_types text/css application/javascript application/json image/svg+xml;
    gzip_min_length 1024;

    location ~* \.(js|css|png|jpg|jpeg|gif|svg|woff2)$ {
        expires 30d;
        add_header Cache-Control "public, immutable";
    }

    location / {
        try_files $uri $uri/ =404;
    }

    # ... certbot-managed SSL directives above this block
}
gzip shrinks text-based responses before they leave the server, usually a 60-80% size reduction on JS/CSS/JSON. The expires and Cache-Control headers on hashed static assets tell the browser it's safe to cache them for a month without re-checking, since a content change would produce a differently-named file anyway (this only works if your build tool fingerprints filenames, which most modern bundlers do by default). This is still the entire deployment story: copy files, reload nginx if the config changed. No moving parts, no process to keep alive.
8. Tier 3: React and Next.js Static Export
Once a project is built with a framework like React or Next.js but doesn't need server-side rendering or API routes, you can export it to plain static files and serve it exactly like Tier 1 and 2, no Node process running on the server at all.
In Next.js, this means setting the static export output mode:
// next.config.js
/** @type {import('next').NextConfig} */
module.exports = {
  output: 'export',
}
Building now produces an out/ directory of plain HTML, CSS, and JS, no server required:
npm run build
# creates ./out/
Deploy it exactly like the earlier tiers:
scp -r ./out/* deploy@yourdomain.com:/var/www/yourdomain.com/
The catch, and it matters: output: 'export' disables anything that needs a live Next.js server. API routes, middleware, image optimization via next/image's default loader, and dynamic server-rendered pages all stop working. This tier is the right choice for content-driven sites, portfolios, and marketing pages with no backend logic. The moment your project needs an API route or server-rendered personalization, you've outgrown it, and that's exactly what the next tier is for.
9. Tier 4: Next.js With Plain next start
This is where a Node process enters the picture for the first time, and where the deployment story changes shape. Instead of copying static files, you're now running your application's server on the VPS itself, and nginx's job shifts from serving files directly to reverse-proxying requests to that running process.
A standard Next.js build with next start needs the full .next build output and your complete node_modules folder present on the server:
npm run build
npm run start   # runs `next start`, listening on port 3000 by default
Point nginx at it as a reverse proxy instead of serving files from disk:
server {
    listen 443 ssl;
    server_name yourdomain.com;

    location / {
        proxy_pass http://localhost:3000;
        proxy_http_version 1.1;
        proxy_set_header Upgrade $http_upgrade;
        proxy_set_header Connection 'upgrade';
        proxy_set_header Host $host;
        proxy_cache_bypass $http_upgrade;
    }

    # ... certbot-managed SSL directives above this block
}
The Upgrade/Connection headers are what let a connection switch protocols mid-request, which any WebSocket-based feature you add later (live updates, a chat widget, real-time notifications) will depend on. It costs nothing to include them now, and tracking down why a WebSocket connection silently fails months from now, because a proxy header was missing, is a much worse way to spend an afternoon.
The honest downside of this tier: next start needs node_modules in full on the server, which for a typical project is hundreds of megabytes and can include dependencies your production build never actually executes. It works, and for a single small app it's genuinely fine, but it's not the leanest option. If npm run start is the only thing keeping your app alive, it dies the moment your SSH session or terminal does, unless you background it properly. Both of those problems get solved in the next two tiers.
10. Tier 5: Next.js Standalone Output With an API Layer and a Database
output: 'standalone' is a meaningfully different, more advanced build target than the plain next start from Tier 4, not just a smaller version of the same thing. Where next start needs your full node_modules, standalone output produces a self-contained folder with a server.js file and only the exact production dependencies your app traces to, pre-bundled. Projects usually reach for this tier around the same time they start growing an API layer and a database connection, which is exactly the build target that stage of a project deserves.
Enable it:
// next.config.js
/** @type {import('next').NextConfig} */
module.exports = {
  output: 'standalone',
}
Build, then note what standalone output produces:
npm run build
# .next/standalone/server.js       <- self-contained server, no node_modules needed
# .next/standalone/.next/static/   <- NOT copied automatically, must be added manually
# .next/static/                    <- the real static assets, copied separately
Standalone builds deliberately don't copy static assets or the public/ folder into the output. You copy those yourself, once, as a deploy step:
cp -r public .next/standalone/
cp -r .next/static .next/standalone/.next/
Then run it directly with plain Node, no framework CLI, no dev dependencies required on the server at all:
node .next/standalone/server.js
An API layer and a database typically enter the picture at this tier, because a project mature enough to justify optimizing its deployment footprint is usually also mature enough to have outgrown static content (this guide on typing Server Actions and API boundaries is worth a read once you're here). If your API routes talk to Postgres or another database, that connection lives in environment variables loaded at runtime, never baked into the build:
DATABASE_URL=postgresql://user:pass@localhost:5432/mydb node .next/standalone/server.js
nginx's reverse-proxy config is identical to Tier 4, the same proxy_pass http://localhost:3000 block. What's changed is what's running behind it: a smaller, faster-starting, dependency-minimal server instead of the full Next.js CLI. The next two tiers are about keeping that process alive reliably, not about the build itself.
11. Tier 6: PM2 for Process Management
Running node server.js directly has an obvious failure mode: close the terminal, lose the SSH connection, or hit an uncaught exception, and your app is down until someone notices and manually restarts it. PM2 exists to remove the human from that loop.
sudo npm install -g pm2
Start your app under PM2 instead of running it directly:
pm2 start .next/standalone/server.js --name my-app
PM2 now keeps that process alive. It restarts automatically on a crash, captures stdout/stderr into log files you can tail, and, with one more step, survives a full server reboot:
pm2 startup    # prints a command to run once, wiring PM2 into systemd
pm2 save       # persists the current process list to restore after reboot
Useful day-to-day commands:
pm2 list                 # see everything currently managed
pm2 logs my-app          # tail logs for one process
pm2 restart my-app       # zero-downtime-ish restart
pm2 monit                # live CPU/memory dashboard
PM2 is the right tool for exactly one situation: a single Node process (or a handful) running directly on the VPS, where you want crash recovery and reboot persistence without the overhead of learning Docker. It isn't a stepping stone you keep once Docker enters your workflow. Running PM2 inside a container to manage processes that docker restart --restart=unless-stopped should already be managing just duplicates responsibility for no benefit. When the next tier's problem shows up, multiple services, a need for reproducible environments, isolation between projects, PM2 gets retired for that project rather than layered underneath Docker.
12. Tier 7: Docker and Containerization
PM2 already solves the problem of keeping one process alive. Docker solves a different one: making sure the environment your app runs in on the server is identical to the one it ran in on your machine and in CI, and making it possible to run several unrelated services on one box without their dependencies colliding.
A minimal multi-stage Dockerfile for a Next.js app in standalone mode looks like this:
FROM node:22-alpine AS builder
WORKDIR /app

COPY package.json package-lock.json ./
RUN npm ci

COPY . .
RUN npm run build

FROM node:22-alpine AS runner
WORKDIR /app

ENV NODE_ENV=production
COPY --from=builder /app/.next/standalone ./
COPY --from=builder /app/.next/static ./.next/static
COPY --from=builder /app/public ./public

EXPOSE 3000
CMD ["node", "server.js"]
The multi-stage pattern matters: the builder stage has the full toolchain (npm, dev dependencies, source files) needed to produce a build, but none of that ships in the final image. The runner stage copies out only the standalone output from Tier 5, the same self-contained server.js and minimal dependency set, now wrapped in a container instead of run directly. Build and run it locally to confirm it works before it ever touches the server:
docker build -t my-app .
docker run -p 3000:3000 my-app
On the VPS, nginx's job doesn't change. It still reverse-proxies to localhost:3000 exactly like Tier 4 and 5. What's different is that the process behind that port is now a container, managed by Docker instead of PM2:
docker run -d --name my-app --restart unless-stopped -p 3000:3000 \
  -e DATABASE_URL=postgresql://user:pass@localhost:5432/mydb \
  my-app
The -e flag carries forward the same environment-variable pattern from Tier 5, now scoped to the container instead of the shell. --restart unless-stopped gives you PM2's crash-recovery and reboot-persistence behavior natively, without PM2 in the picture at all. That's the clean hand-off: one project, one tool managing its lifecycle. For projects with more than one container, an app plus a database, or several services, docker compose describes the whole stack in one file instead of a growing list of docker run flags, which is exactly what the CI/CD pipeline in the next section deploys against.
13. CI/CD With GitHub Actions
Everything up to this point has been a manual deploy: SSH in, pull code or copy a file, restart a process. That's fine for the first deploy of a project. It stops being fine the tenth time you do it by hand and forget a step. GitHub Actions closes that loop: push to main, and a new container image gets built, pushed to a registry, and pulled onto your server automatically.
The pipeline has three parts: build the image, push it to GitHub Container Registry (GHCR), then SSH into the server to pull and restart.
# .github/workflows/deploy.yml
name: Build and Deploy

on:
  push:
    branches: [main]

permissions:
  contents: read
  packages: write

jobs:
  build-and-push:
    runs-on: ubuntu-latest
    steps:
      - uses: actions/checkout@v4

      - name: Log in to GHCR
        uses: docker/login-action@v3
        with:
          registry: ghcr.io
          username: ${{ github.actor }}
          password: ${{ secrets.GITHUB_TOKEN }}

      - name: Build and push
        uses: docker/build-push-action@v6
        with:
          context: .
          push: true
          tags: ghcr.io/${{ github.repository }}:latest

  deploy:
    needs: build-and-push
    runs-on: ubuntu-latest
    steps:
      - name: Deploy over SSH
        run: |
          mkdir -p ~/.ssh
          echo "${{ secrets.DEPLOY_SSH_KEY }}" > ~/.ssh/deploy_key
          chmod 600 ~/.ssh/deploy_key
          echo "${{ secrets.DEPLOY_KNOWN_HOSTS }}" > ~/.ssh/known_hosts
          ssh -i ~/.ssh/deploy_key -o UserKnownHostsFile=~/.ssh/known_hosts \
            ${{ secrets.DEPLOY_USER }}@${{ secrets.DEPLOY_HOST }} \
            "docker pull ghcr.io/${{ github.repository }}:latest && \
             docker compose up -d && \
             docker image prune -f"
Two things in this pipeline are worth explaining beyond what a code comment can say.
The SSH key deserves to be its own, separate from your personal one. Don't reuse the key from section 3 for CI. Generate a new pair specifically for GitHub Actions:
ssh-keygen -t ed25519 -f deploy_key -C "github-actions-deploy" -N ""
Add deploy_key.pub to the server's authorized_keys (same as before), and store the private key (deploy_key) as the DEPLOY_SSH_KEY repository secret. If this key ever leaks, a misconfigured log, a compromised dependency in the workflow, it's scoped to a deploy-only credential you can revoke without touching your own access.
The known_hosts secret matters for a similar reason. The first time any SSH client connects to a new host, it's asked to trust that host's identity, normally an interactive prompt. CI has no terminal to answer that prompt, so the lazy fix is StrictHostKeyChecking=no, which silently accepts any host claiming to be your server. The correct fix is to fetch your server's actual host key once and store it as a secret instead:
ssh-keyscan -H yourdomain.com >> known_hosts_output
# copy the contents of known_hosts_output into the DEPLOY_KNOWN_HOSTS secret
That way the workflow verifies it's actually talking to your server, not silently trusting whatever answers on that IP.
The deploy command itself assumes a docker-compose.yml already exists on the server referencing the image by name. The workflow's job is only to pull the new version and recreate the running container from it. docker compose up -d stops the old container and starts the new one, so there's a brief gap, usually a second or two, where the app is unreachable mid-swap; for a personal project or low-traffic app that's an acceptable tradeoff, but it's worth knowing this isn't a zero-downtime deploy. docker image prune -f cleans up the now-unused previous image afterward, which matters more than it sounds: without it, every deploy leaves the old image on disk, and a 1GB-RAM VPS with limited storage fills up faster than you'd expect after a few dozen deploys.
Automating the deploy also means a bad commit reaches production automatically, with nobody in the loop to catch it first. When that happens, git revert on the offending commit is faster and safer than SSHing in to hand-roll a rollback — push the revert and this same pipeline ships the fix. The git commands worth knowing for that moment, and the ones before it are worth reading before you need them at 11pm.
14. Running Many Projects on a Low-RAM VPS
Everything in this post so far assumes one project per server. In practice, the whole reason a $6/month VPS is worth learning this stack for is that it can comfortably host several small projects at once, a portfolio, a couple of client sites, a side project's API, if you're deliberate about resource limits. This section is where the swap file from section 4 stops being a safety net you set up once and forget, and becomes the thing that keeps three unrelated projects from taking each other down.
The swap file's sizing is worth revisiting first. A 1-2GB swap file was enough for a single project's occasional build spike. With three or four Node processes or containers running concurrently, undersized swap turns a memory spike in one project into an OOM kill in an unrelated one. If free -h shows swap regularly under pressure, resize it: delete and recreate at 4GB rather than incrementally growing the existing file.
PM2 processes need memory limits too, so one runaway project can't consume everything:
pm2 start server.js --name project-a --max-memory-restart 200M
PM2 restarts the process automatically if it exceeds this ceiling, a contained failure instead of the whole server running out of memory. Docker containers get the same treatment:
docker run -d --name project-b --memory="256m" --memory-swap="512m" \
  --restart unless-stopped -p 3001:3000 project-b-image
--memory caps RAM; --memory-swap sets the combined RAM+swap ceiling. Without these flags, a single container can consume the entire host's memory before Docker's own OOM killer steps in. With them, a bug in one container is a contained, predictable failure.
nginx can take load off memory-constrained processes too. For content that changes infrequently, a simple proxy cache means requests never have to reach your app at all:
proxy_cache_path /var/cache/nginx levels=1:2 keys_zone=app_cache:10m max_size=100m inactive=60m;

server {
    location / {
        proxy_cache app_cache;
        proxy_cache_valid 200 10m;
        proxy_pass http://localhost:3000;
    }
}
Finally, give each project its own subdomain and its own nginx server block, each proxying to a different local port, 3000 for one project, 3001 for the next, and so on, with its own independent Certbot certificate:
sudo certbot --nginx -d project-a.yourdomain.com
sudo certbot --nginx -d project-b.yourdomain.com
None of these projects know about each other. nginx is the only thing that knows all of them live on the same box, routing by domain name to the right port. This is the real payoff of everything in this post: SSH hardening, nginx and Certbot as a one-time baseline, a swap file sized for real headroom, and memory limits set deliberately per process, together, they turn a single cheap VPS into a small, stable multi-tenant server instead of a fragile single-purpose box that falls over the moment you add a second project.
Looking back, the afternoon I lost to that first bad deploy wasn't wasted. It was the first honest look I'd taken at infrastructure I'd been renting my ignorance of for years, one $6/month box at a time turning into something I actually understood, from the DNS record down to the container running on it. I'm not faster at shipping because of any of this. I just don't have to wonder what's happening underneath anymore.
If you're weighing whether your team should own its deployment infrastructure or lean further into a managed platform, I help teams make that call, and build whichever version is right for where they actually are, not where a blog post assumes they should be.
For the architecture decisions that shape what you're deploying in the first place, this deep dive on scalable Next.js apps is the natural next read.
Frequently Asked Questions
How do I deploy a Next.js app to a VPS instead of Vercel?⌄
Provision an Ubuntu VPS, point your domain's DNS A record at its IP, install nginx and certbot for SSL, then run your Next.js app behind nginx as a reverse proxy. For a simple setup, build with `output: 'standalone'` and run it with PM2 for process management. For production setups with multiple apps or services, containerize it with Docker and deploy new versions via a GitHub Actions pipeline that builds an image, pushes it to a registry, and pulls it on the server over SSH.
What is the difference between next start and output: 'standalone' in Next.js?⌄
`next start` runs your app using the full `.next` build directory and requires your complete `node_modules` folder on the server. It's simple to set up but heavier to deploy. `output: 'standalone'` produces a self-contained `server.js` with only the production dependencies your app uses, bundled into a much smaller folder. Standalone is the leaner, more production-appropriate choice, especially inside a Docker image where every extra megabyte slows down builds and deploys.
Should I use PM2 or Docker to run a Node.js app in production?⌄
PM2 is the right tool when you're running one or two Node processes directly on a VPS and need crash recovery, log management, and reboot persistence without the overhead of containers. Docker is the right tool once you have multiple services, need reproducible environments across machines, or want your deployment pipeline to ship an immutable artifact. Most projects start with PM2 and graduate to Docker as complexity grows. Running PM2 inside a container defeats the purpose of both tools, so pick one per project rather than combining them.
How do I set up free SSL on a VPS with nginx?⌄
Install Certbot's nginx plugin (`sudo apt install certbot python3-certbot-nginx`), make sure your domain's DNS A record already points at the server's IP, then run `sudo certbot --nginx -d yourdomain.com`. Certbot edits your nginx server block automatically to add the certificate and redirect HTTP to HTTPS, and it installs a systemd timer that renews the certificate before it expires. Let's Encrypt certificates are valid for 90 days.
Can I host multiple projects on one VPS with nginx?⌄
Yes, this is the normal way to run a personal or small-team VPS. Install nginx and certbot once, then add a separate nginx server block per domain or subdomain, each proxying to a different port or app on the same machine. Run `certbot --nginx -d subdomain.example.com` once per domain to get an independent SSL certificate for each project. On a low-RAM VPS (1GB or less), add a swap file and set memory limits on PM2 processes or Docker containers so one heavy project can't starve the others.
What secrets do I need for a GitHub Actions deploy pipeline over SSH?⌄
At minimum: a dedicated deploy-only SSH private key (not your personal key) stored as a repository secret, the corresponding public key added to the server's `authorized_keys`, the server's SSH host key added as a `known_hosts` secret so the connection can be verified without prompting, and the deploy user and host address. Keep this key scoped narrowly, ideally to a user with just enough permission to pull images and restart containers, not full root access.
How much RAM does a VPS need to run a Next.js app?⌄
A single small Next.js app in standalone mode can run on a 512MB-1GB VPS, especially with a swap file as a buffer against memory spikes during builds or traffic bursts. Running multiple apps on the same box, or building Docker images directly on the server, pushes real comfort into the 2GB range. If you're staying on a 1GB instance, build your Docker images in CI rather than on the server, set explicit memory limits per process or container, and configure a swap file before you need it.
Published: Sun Aug 23 2026